Insert mail merge fields When you start your email merge , label merge , or letter merge and connect your document to yo...
Insert mail merge fields
When you start your email merge, label merge, or letter merge and connect your document to your mailing list, you can add mail merge fields to personalize the content. The merge fields come from the column headings in your mailing list (also known as your "data source"). Here's an example of how fields in an Excel mailing list appear in your mail merge document.

The mail merge fields that you insert pull in the information from your mailing list, customizing each envelope, email message, label, or letter.
To save you the work of putting each individual field in your document, Word includes the Address Block and Greeting Line tools, which add all the fields for an address or greeting, so you don't have to add each field one at a time.
Add an Address Block
To easily add an address block to your letter, envelope or label use the Address Block tool.
-
Click where you want to add the address block in your document.
-
Choose Address Block
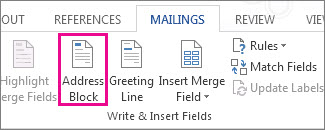
Note: If the Address Block command is grayed out, click Select Recipients and choose the kind of mailing list you're using—Outlook Contacts, an Excel spreadsheet, or an .mdb file that you created earlier in Word. If you don't have a mailing list yet, click Type New List to create your list in Word.
Word gives you options for making the name on the address more formal or more informal.
Tip: To make mailing labels single spaced, select the Address Block field, click Page Layout (Word 2013) or Layout (Word 2016) and enter 0 in the Before and After boxes under Spacing.
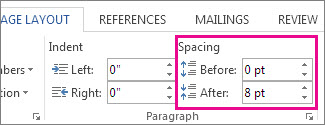
To make sure addresses in an Excel spreadsheet come through the merge correctly, see Format mail merge numbers, dates, and other values in Excel.
Add a Greeting Line
To add a standard greeting to your email message or letter, use the Greeting Line tool
-
Click where you want to add the greeting in your document.
-
Choose Greeting Line.
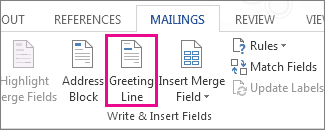
Note: If the Greeting Line command is grayed out, choose Select Recipients and select the kind of mailing list you're using—Outlook Contacts, an Excel spreadsheet, or an .mdb file that you created earlier in Word. If you don't have a mailing list yet, click Type New List to create your list in Word.
-
Choose the name style that you want to use, and set other options.
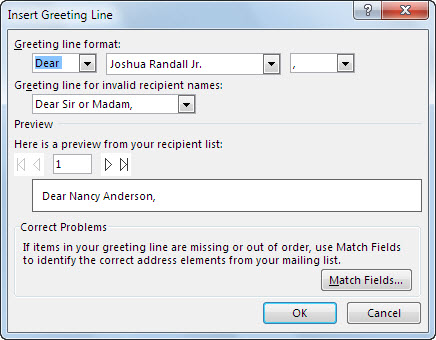
Tip: To be sure Word finds the names and addresses in your list, choose Match Fields. Check if the fields you want, appear in the list. If a field you want says Not Matched, select the drop-down list for that field and then choose the column name that matches that column in your list.
-
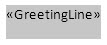
To make sure the field is formatted the way you want, highlight the whole field, including the marks at each end.
-
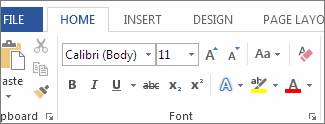
Choose Home, and then check the font and font size.
-
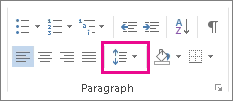
Choose Line Spacing to make sure the line spacing matches the spacing in the rest of your document.
After you add the fields you want to merge, type the information you want to be the same in each letter, email, envelope or label you create during the merge.
Add individual merge fields
If you want to add information from your mailing list to your document, you can add the merge fields one at a time.
-
Click where you want to add the mail merge field in your document.
-
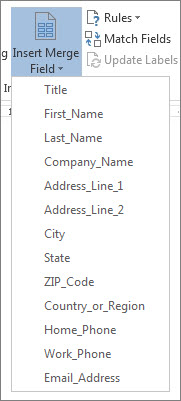
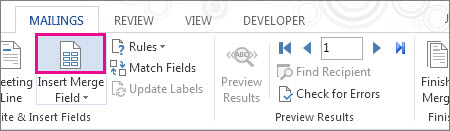
Choose the drop down next to Insert Merge Field, and then select the field name.
-
If you don't see your field name in the list, choose the Insert Merge Field button.
-
Choose Database Fields to see the list of fields that are in your data source.
-
Note: If you don't see the fields from your data source, check if your document is connected to the correct data source. Choose Edit Recipient List and confirm that the Data Source field matches the source you intended to use.
-
Choose Insert.
Note: If some of the numbers, currencies, or dates aren't formatted right, see Format mail merge numbers, dates, and other fields for help.
Using advanced mail merge fields
When you are creating a letter or an email to all your customers and you want the message to say different things depending on different values in certain fields of your data source - you can use a rule to fill in a field. For example, invoices could include the words "Past Due" if the due date for the balance due is in the past.
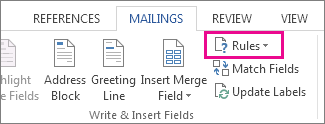
To set up a rule and an advanced field, on the Mailings tab, in the Write & Insert Fields group, choose Rules and select the kind of field you want to add.
For more information about how you can use mail merge rules, see set up mail merge rules
For end-to-end mail merge steps, see Use Word mail merge for email, Mail merge for labels, or Use mail merge to personalize letters
Add Date or Time
To insert the current date and/or time into your document go the Insert tab of the Ribbon and select Date & Time from the Text group. In the Date and Time dialog box select the format that matches what you would like to insert. Click OK to insert your selection.
Tip: If you want the date or time to update automatically to the current date and time whenever you open this document in the future, choose the Update automatically checkbox before clicking OK.
See also
-
Watch Take mail merge to the next level - A free video training that explains sorting and filtering mail merge fields, customising your mail merge with personalised messages and inserting custom merge fields.
Do you have a question about Word Mail Merge that we didn't answer here?
Post a question in the Word Answers Community
Help us improve Word
Do you have suggestions about how we can improve Word? If so, please visit Word UserVoice and let us know!


COMMENTS