Create a quiz with Microsoft Forms As an educator, you can use Microsoft Forms to quickly assess student progress and get rea...
Create a quiz with Microsoft Forms
As an educator, you can use Microsoft Forms to quickly assess student progress and get real-time feedback through the use of quizzes that you design and share with your class.
You can create a quiz with questions that are required to be completed, display question hints, and even display students' points and feedback after they complete the quiz, which make for a more interactive learning experience for your students.

Microsoft Forms also comes included with rich, real-time analytics that provide summary information for the educator as well as results for individual students. You can export the quiz results to Microsoft Excel for more in-depth analysis.
Tip: Are you creating a survey, requisition, assessment, or other type of form? Start here.
To get started with building a quiz, follow these steps:
-
In your web browser, navigate to http://forms.microsoft.com.
-
Sign in to Office 365 with your O365 Education account information (School ID).
-
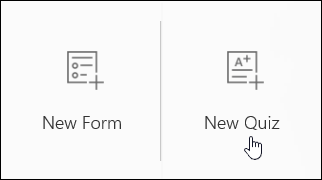
Under My Forms, click New quiz to begin creating your quiz.
-
Enter a name for your quiz. You can also enter an optional subtitle for your quiz.
Note: Quiz names can contain up to 90 characters and a subtitle can contain up to 1,000 characters.

-
Click Add Question to add a new question to the quiz. You can choose to add Choice, Text, Rating, or Date questions.
Note: Your quiz is saved automatically while you create it.

You can also choose to add a ranking question in which options appear in random order when you share your quiz. To add a ranking question, click the More button (...), and then select Ranking.

-
Enter the text you want to display for the question and each of the choices.
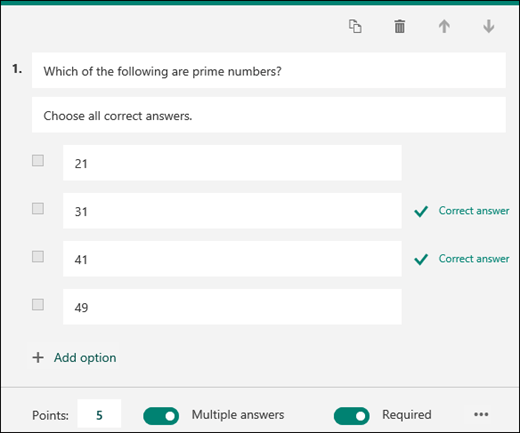
Want to add more choices? Click Add Option to add more choices than the default two choices. Click the Correct Answer check box button next to each correct answer. To remove a choice, click the trash can button next to it. You can also choose to make a question required or allow multiple choices for a question by changing the settings at the bottom of the question.
Tip: Click the ellipses button (…) and then click Subtitle to add a subtitle for the question.
Enter a number in the Points text box to assign a point value for a correct answer to the quiz question.
-
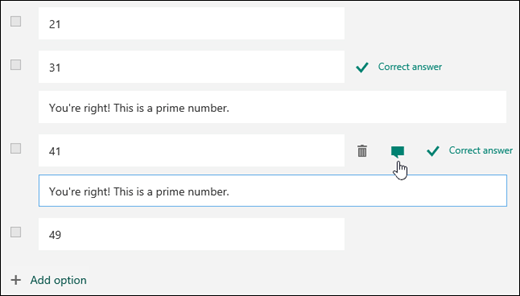
Click the Message button next to the choices if you want to display a custom message to your students who select that choice as their answer.
-
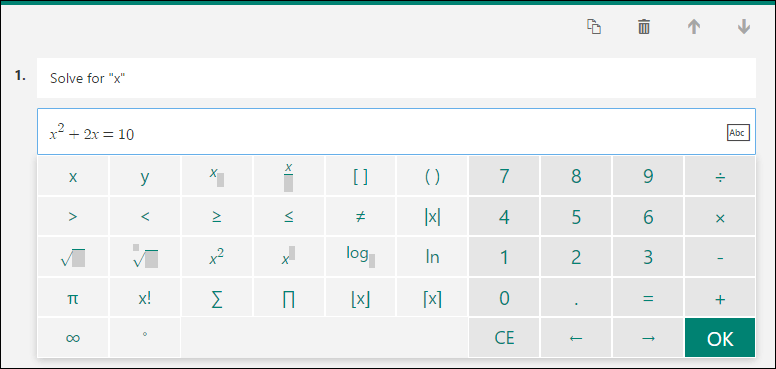
To display math formulas, click the ellipses button (...) and then click Math.
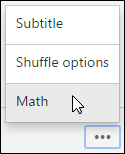
Click in each question text box and now Microsoft Forms displays various math formula options for you to use in your quiz.
-
Some math formulas will trigger auto answers.
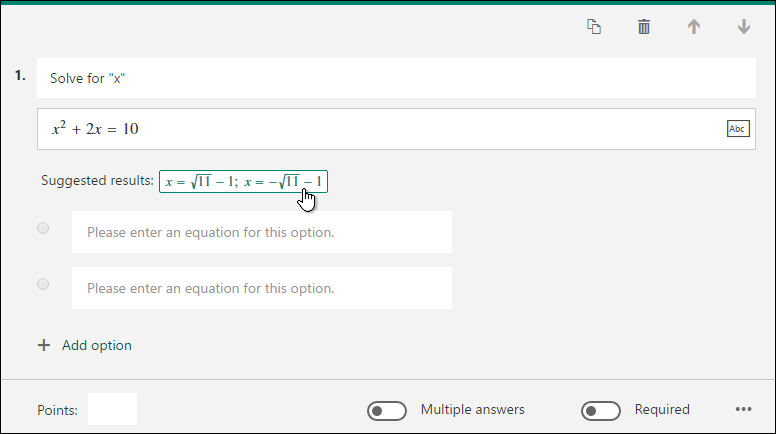
Click on the suggested option to add it as a choice.
-
Click Add Question to add more questions to your quiz. To change the order of the questions, click the Up or Down arrows on the right side of each question. For text questions, select the Long Answer option if you want a larger text box displayed on the quiz.
Tip: To copy a question, select it and then click the Copy Question button in the upper right corner.
-
Click Preview at the top of the design window to see how your quiz looks on a computer or mobile device. To test your quiz, enter answers for the quiz questions in preview mode and then click Submit.

Click Back when you are finished previewing or testing your quiz.
To get started with building a quiz, follow these steps:
-
Sign in to Office 365 with your O365 Education account information (School ID).
-
Open the notebook in which you want to insert a quiz.
-
On the Insert tab, select Forms.

-
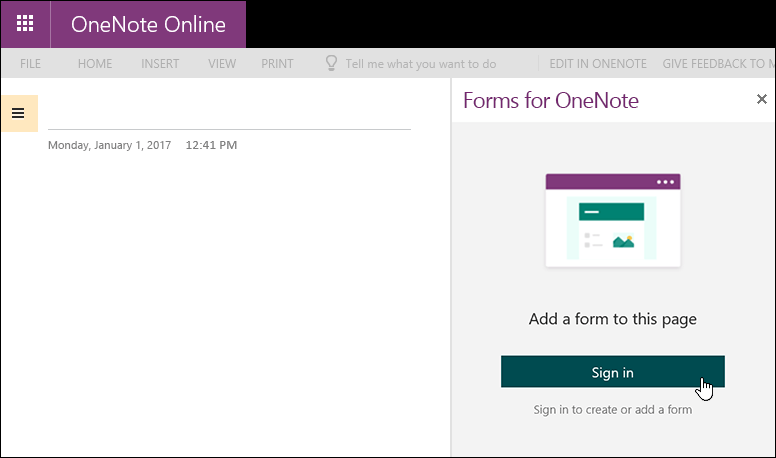
A Forms for OneNote panel will open and dock on the right side of your OneNote notebook.
-
Click Sign in.
-
When you see the message, "Forms for OneNote wants to display a new window," click Allow.
-
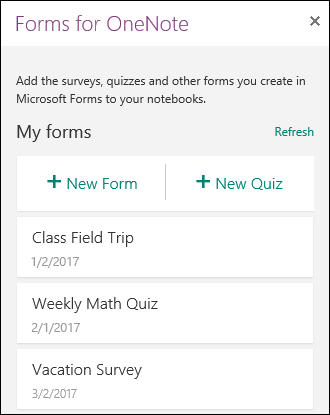
In the Forms for OneNote panel, you'll now see a list of any quizzes and forms you've created.
-
Under My Forms, click New Quiz to begin creating your quiz. A new window will open with a blank quiz and default title ("Untitled quiz").
-
Enter a name for your quiz. You can also enter an optional subtitle for your quiz.
Note: Quiz names can contain up to 90 characters and a subtitle can contain up to 1,000 characters.

-
Click Add Question to add a new question to the quiz. You can choose to add Choice, Text, Rating, or Date questions.
Note: Your quiz is saved automatically while you create it.

-
For choice questions, enter the text you want to display for the question and each of the choices.

Want to add more choices? Click Add Option to add more choices than the default two choices. Click the Correct Answer check box button next to each correct answer. To remove a choice, click the trash can button next to it. You can also choose to make a question required or allow multiple choices for a question by changing the settings at the bottom of the question.
Tip: Click the ellipses button (…) and then click Subtitle to add a subtitle for the question.
Enter a number in the Points text box to assign a point value for a correct answer to the quiz question.
-
Click the Message button next to the choices if you want to display a custom message to your students who select that choice as their answer.

-
To display math formulas, click the ellipses button (...) and then click Math.

Click in each question text box and now Microsoft Forms displays various math formula options for you to use in your quiz.

-
Some math formulas will trigger auto answers.

Click on the suggested option to add it as a choice.
-
Click Add Question to add more questions to your quiz. To change the order of the questions, click the Up or Down arrows on the right side of each question. For text questions, select the Long Answer option if you want a larger text box displayed on the quiz.
Tip: To copy a question, select it and then click the Copy Question button in the upper right corner.
-
Click Preview at the top of the design window to see how your quiz looks on a computer or mobile device. To test your quiz, enter answers for the quiz questions in preview mode and then click Submit.

Click Back when you are finished previewing or testing your quiz.
-
Your newly created form will appear at the top of your My forms list under the New Form and New Quiz buttons.

-
When you're ready, you can insert your quiz into your OneNote notebook.
Got feedback on Microsoft Forms?
We'd love to hear from you! In the upper right corner of the Microsoft Forms window, click More Options (...) > Feedback. You can also visit the Microsoft Forms User Voice site to provide suggestions and vote on ideas others have already submitted.


COMMENTS