Create project timelines in Visio 2007 Microsoft Office Visio 2007 Step by Step By Judy Lemke a...
Create project timelines in Visio 2007
Microsoft Office Visio 2007 Step by Step
By Judy Lemke and Resources Online
Judy Lemke specializes in documentation and training for Microsoft Office Visio. She is an award-winning writer with more than ten years of experience writing, editing, and designing everything from developer documentation and tutorials to product manuals and marketing collateral.
To learn more about other books on the 2007 Microsoft Office system, visit Microsoft Press.
Effective project schedules are vital to a successful project. Project schedules help you track project dates, milestones, phases, and tasks. Although there are many ways to create project schedules, the finished product should make it easy to see the progress of the project from the big picture down to the details. This exercise included in this article demonstrates how to use Microsoft Office Visio 2007 timelines to visualize your overall project plan and present this information to executives and others who need to grasp it quickly. Timelines can help you keep your project on track, and ultimately contribute to the success of your project.
Create timelines to view projects at a glance
When you're planning a project, timelines help you visualize the big picture and identify the project's scope. They come in handy when you want to present high-level project information to those who need to view this information at a glance. You can begin creating your timelines during brainstorming sessions and modify them as your project plans develop.
A timeline is a graphic that represents a specific period of time and the events that occur during that period. Timelines are particularly good at showing an overview of a project — project status, history of events, and what's to come. They also usually include milestones and interval markers.
Your project-schedule diagrams can include one or more timelines on a drawing page, and the timelines can be synchronized. For example, you can use an expanded timeline to represent a segment of the primary timeline, and then work with the expanded timeline individually to show more detail. You can add milestones or intervals to the expanded timeline just as you would to the primary timeline. The items you add to the expanded timeline don't appear on the primary timeline. However, any shape you add to the primary timeline also appears on the expanded timeline and is synchronized with the shape on the primary timeline. Think of the primary timeline as the complete high-level view of events, and the expanded timeline as a more detailed glimpse into a particular portion of that time period. You can use this synchronized timeline method to display various levels of information for one project — all on one page — in easy-to-understand form.
Milestones represent significant events or dates in a schedule, such as the date the building phase of a project is complete. They can highlight dates when you want to evaluate the progress of your project and make necessary decisions or adjustments. Interval markers specify a length of time. Use them to represent the beginning and end of a process or phase. For example, you could use an interval marker to represent the time period of a building phase in a project. You can even show the percentage of the interval that's complete as a line on the interval marker.

Exercise – Creating a primary and expanded timeline
Timelines can be created with the Timeline template included in Visio 2007. Shapes can be added to this template that represent milestones and interval markers to a timeline. After you add shapes to the timeline, you can reposition the shapes by dragging them. Visio updates a shape's date according to its position on the timeline. You can also right-click a shape and reconfigure it by clicking the appropriate command on the shape's shortcut menu. Visio repositions the shape on the timeline according to the shape's date.
This exercise walks you step by step through the process of creating a primary timeline and an expanded timeline using the Timeline template. You will add interval markers and milestones to both timelines, and then add a title and background to the diagram.
-
Start Visio. In the Template Categories list, click Schedule.
-
Under All Templates, double-click Timeline. Visio opens the Timeline template that opens a blank drawing page and the Timeline Shapes, Borders and Titles, and Backgrounds stencils. Opening the Timeline template also inserts a Timeline menu on the Visio menu bar.

Tip: If you already have project data in a Microsoft Office Project, Microsoft Office Excel, or text file format, you can import it into Visio by using the Import Timeline Wizard. After you open the Timeline template, drag a timeline onto the drawing page and configure it. Then on the Timeline menu, click Import Timeline Data. Follow the steps in the wizard to import the project data.
-
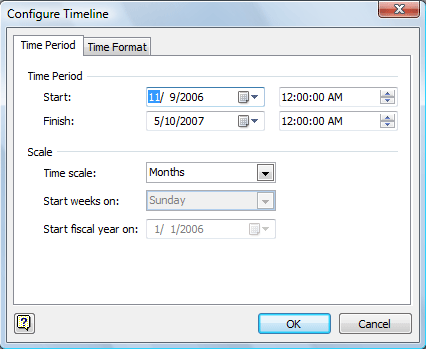
From the Timeline Shapes stencil, drag a Cylindrical timeline shape onto the drawing page. The Configure Timeline dialog box appears.
-
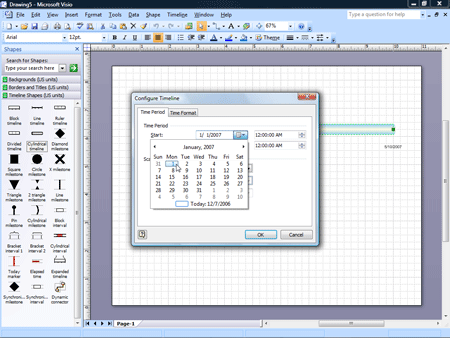
In the Start box, click the down arrow to display a monthly calendar. In the calendar, click the left or right arrow to display the month of January, and then select the start date for the timeline by clicking 1.
-
In the Finish box, click the down arrow to display a monthly calendar. In the calendar, click the left or right arrow to display the month of April, select the finish date for the timeline by clicking 30, and then click OK. Visio positions the timeline on the drawing page and adds dates to it.
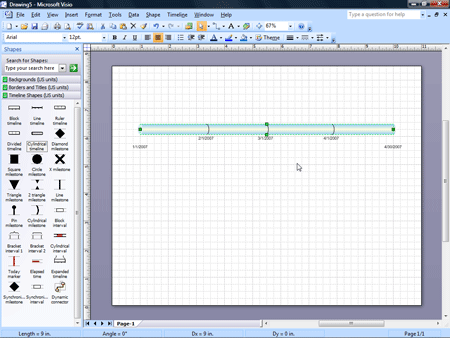
Tip: To reconfigure the timeline, right-click it, and then click Configure Timeline on the shortcut menu. Notice the shortcut menu also includes commands for changing the timeline type and date and time formats.
-
On the Format menu, click Theme. Visio opens the Theme – Colors task pane.
-
In the Apply theme colors list, scroll the theme color list until you see the green Metro theme, and then click it.
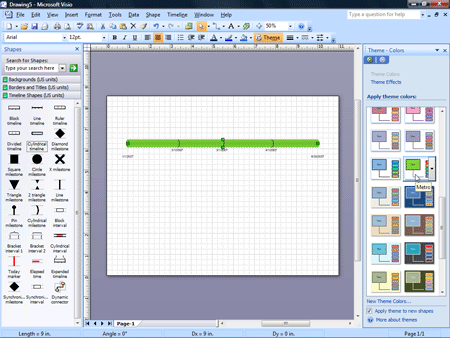
Tip: When you pause the pointer over a theme preview, Visio displays its name.
-
To add an arrowhead to the right end of the timeline, right-click the timeline, and then click Show Finish Arrowhead. Visio adds an arrowhead to the right end of the timeline.
Tip: To change the orientation of a timeline, select the timeline, and then on the Shape menu, point to Rotate or Flip, and click the appropriate command.
-
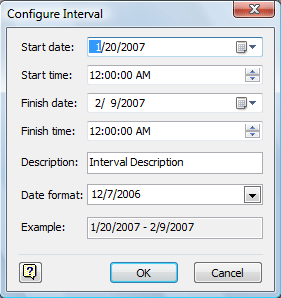
From the Timeline Shapes stencil, drag a Cylindrical interval shape onto the left area of the timeline.The Configure Interval dialog box appears.
-
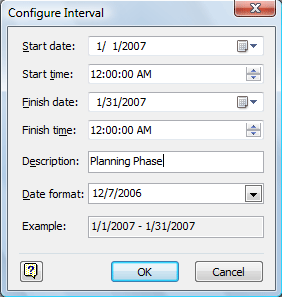
In the Start date box, click the down arrow to display a monthly calendar. In the calendar, click the left or right arrow to display the month of January, and select the start date for the interval by clicking 1.
-
In the Finish date box, click the down arrow to display a monthly calendar. In the calendar, click the left or right arrow to display the month of January, and select the finish date for the interval by clicking 31.
-
In the Description box, select the placeholder text, and replace it by typing Planning Phase.
-
Click OK. Visio positions the interval shape in the correct position on the timeline.
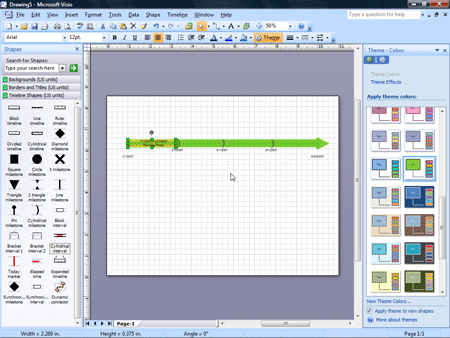
Tip: To reconfigure the interval, right-click it, and click Configure Interval on the shortcut menu. To quickly modify the interval description, select the shape, press the @ key to open the shape's text block, and type a new description. Notice the shortcut menu also includes commands for changing the interval type and showing the percentage of the interval that's complete.
-
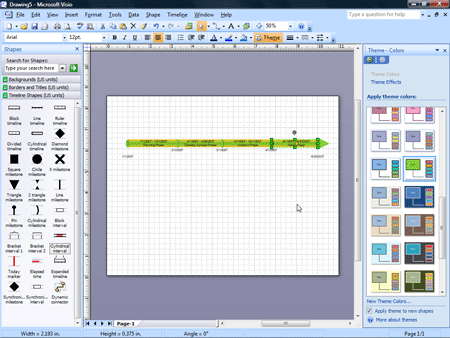
From the Timeline Shapes stencil, drag three more Cylindrical interval shapes onto the timeline and configure them with the information shown in the following table.
| Start Date | Finish Date | Label |
| February 1 | February 28 | Develop Concept Phase |
| March 1 | March 31 | Invitation Phase |
| April 1 | April 30 | Setup Phase |
-
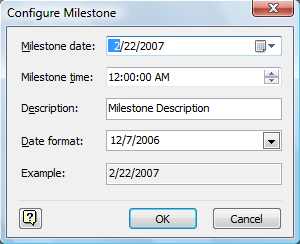
From the Timeline Shapes stencil, drag a Diamond milestone shape anywhere on the timeline. The Configure Milestone dialog box appears.
-
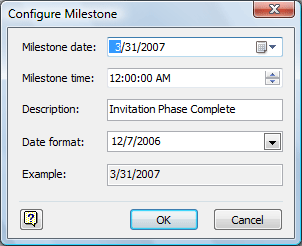
In the Milestone date box, click the down arrow to display a monthly calendar. In the calendar, click the left or right arrow to display the month of March, and select the milestone date by clicking 31.
-
In the Description box, select the placeholder text, and replace it by typing Invitation Phase Complete.
-
Click OK. Visio positions the milestone shape on the timeline.
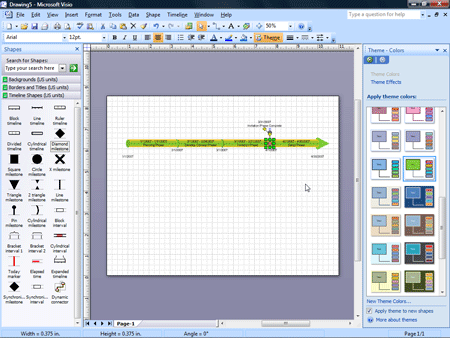
Tip: To reconfigure the milestone, right-click it, and click Configure Milestone on the shortcut menu. Notice the shortcut menu also includes commands for changing the milestone type. To quickly modify the milestone description, select the shape, press the @ key to open the shape's text block, and type a new description.
-
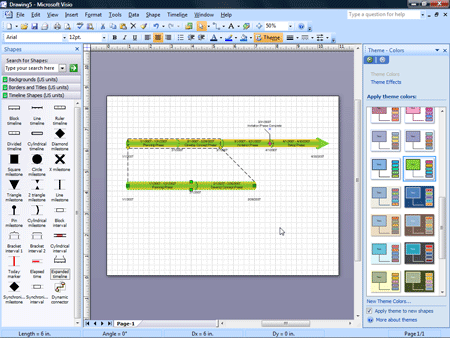
From the Timeline Shapes stencil, drag an Expanded timeline shape onto the drawing page and position it below and left-aligned with the primary timeline. The Configure Timeline dialog box appears.
-
In the Start box, click the down arrow to display a monthly calendar. In the calendar, click the left or right arrow to display the month of January, and select the start date for the timeline by clicking 1.
-
In the Finish box, click the down arrow to display a monthly calendar. In the calendar, click the left or right arrow to display the month of February, and select the finish date for the timeline by clicking 28.
-
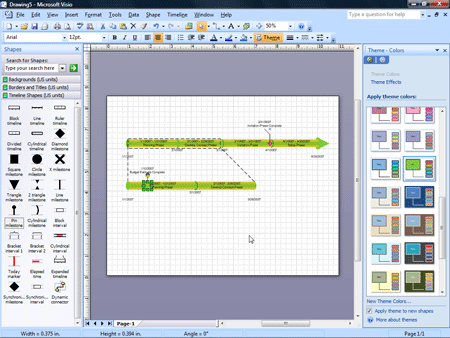
Click OK. Visio adds an expanded timeline for January and February to the drawing page. On the expanded timeline, Visio adds intervals that are synchronized with the intervals on the primary timeline. Gray dashed lines associate the two timelines and indicate the section of the primary timeline that the expanded timeline represents.
-
From the Timeline Shapes stencil, drag a Pin milestone shape onto the expanded timeline. The Configure Milestone dialog box appears.
-
In the Milestone date box, click the down arrow to display a monthly calendar. In the calendar, click the left or right arrow to display the month of January, and select the milestone date by clicking 10.
-
In the Description box, select the placeholder text, and replace it by typing Budget Estimate Complete.
-
Click OK. Visio positions the milestone shape on the expanded timeline. Notice that the milestone doesn't appear on the primary timeline.
-
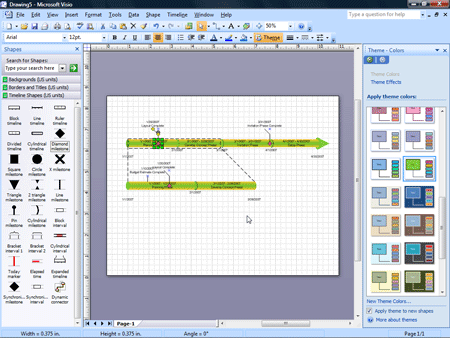
From the Timeline Shapes stencil, drag a Diamond milestone shape onto the primary timeline. The Configure Milestone dialog box appears.
-
In the Milestone date box, click the down arrow to display a monthly calendar. In the calendar, click the left or right arrow to display the month of January, and select the milestone date by clicking 20.
-
In the Description box, select the placeholder text, and replace it by typing Layout Complete.
-
Click OK. Visio positions the milestone shape on the primary timeline. Notice that the milestone also appears on the expanded timeline.
-
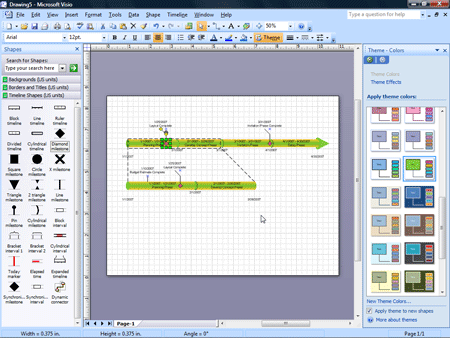
Right-click the Layout Complete milestone on the primary timeline, and click Configure Milestone on the shortcut menu.
-
In the Milestone date box, click the down arrow to display a monthly calendar. In the calendar, select the milestone date by clicking 25, and then click OK. Visio repositions the milestone shape on both timelines.
-
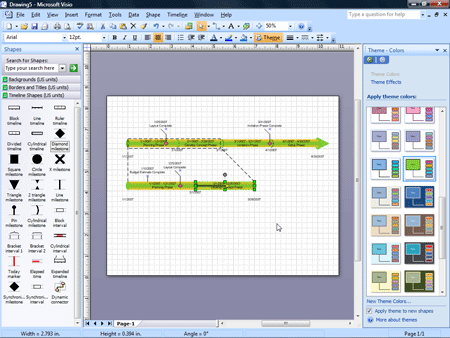
Right-click the Develop Concept Phase interval marker on the expanded timeline, and click Set Percent Complete on the shortcut menu.
-
In the Percent Complete box, type 50, and then click OK.
-
Right-click the Develop Concept Phase interval marker on the expanded timeline, and click Show Percent Complete on the shortcut menu.Visio shows the percent complete with a line on the interval marker. Notice the line appears on the expanded timeline, but not on the primary timeline.
-
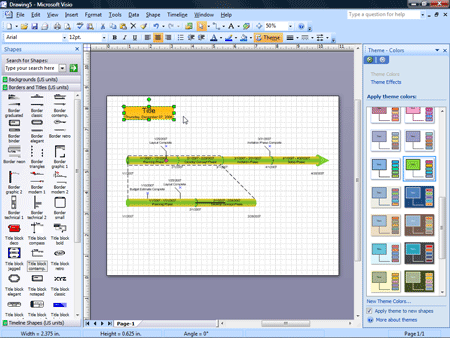
To add a title to the diagram, click the Borders and Titles stencil, drag the Title block contemp. shape onto the drawing page, and position it in the upper-left corner of the page. The Title block contemp. shape includes title placeholder text and the current date.
-
With the Title block contemp. shape selected, press the @ key.
-
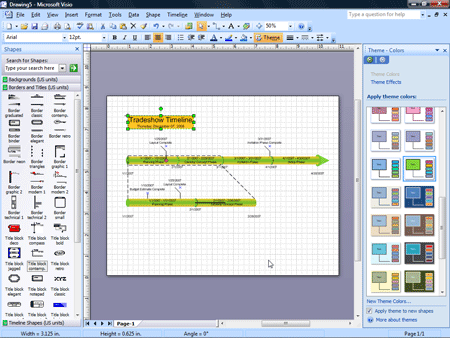
Highlight the word Title, and type Tradeshow Timeline. The shape expands to fit your title.
-
Click the pasteboard to close the text block and deselect the title shape.
-
Click the title shape, and drag it to align it with the left edge of the timeline.
-
On the File menu, click Save As to open the Save As dialog box.
-
In the File name box, type Timeline, and then click the Save button to save the diagram.
-
Close the Timeline file.
Tip: For more information about creating timelines, type Timeline in the Type A Question For Help box in the upper-right corner of the Visio window.


COMMENTS