Use the App Catalog to make custom business apps available for your SharePoint Online environment As a SharePoint Onl...
Use the App Catalog to make custom business apps available for your SharePoint Online environment
As a SharePoint Online admin, you can create an App Catalog site to make internally developed custom apps available for users to install when they browse apps under the From Your Organization filter on the Site Contents page. Site owners can then add these apps to customize sites with specific functionality or to display information.
After an App Catalog site has been created, you can use it to upload any custom apps that your organization has developed. Uploading custom apps isn't much more complicated than uploading a document to a library and setting some properties. You can use the App Catalog site to do things like install custom or third-party apps on sites for users (also called app deployment). You can also manage app requests from users.
For more information about your options for developing custom apps for SharePoint Online, see: Build apps for SharePoint and Apps for SharePoint compared with SharePoint solutions. For information about creating a no-code app using Microsoft Access, see Create an Access app.
Step 1: Create an App Catalog site collection
The first step is to create the App Catalog Site Collection if it hasn't already been created.
Even if you don't plan to make internal custom apps available, you will not be able to do things like change the purchase settings for the SharePoint Store until you create an App Catalog site collection. You can have only one App Catalog site collection per SharePoint Online tenant, but you only have to create it once.
-
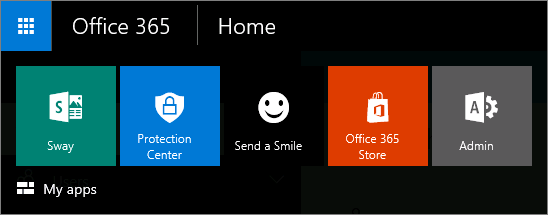
Sign in to Office 365 with your SharePoint Online admin account.
-
Go to the SharePoint admin center.
-
Select Apps from the Quick Launch bar on the left, and then select App Catalog.
-
Select Create a new app catalog site, and then select OK.

-
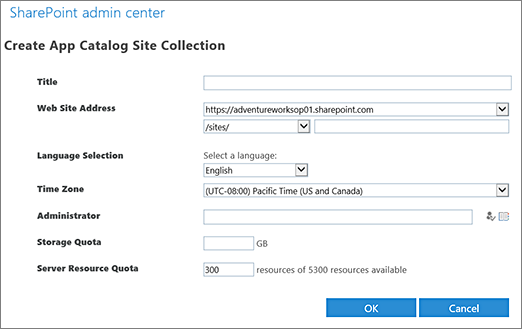
On the Create App Catalog Site Collection page, enter the required information, and then select OK.
Step 2: Add custom apps to the App Catalog site
To get to the App Catalog site once it's been created, navigate to it within the SharePoint admin center (as described above) and select Apps and then click App Catalog. Your app catalog may take a little time to appear. The App Catalog site will have a document library for Apps for Office and a document library for Apps for SharePoint, as well as a list that tracks App Requests from site users.

After you've created an App Catalog site collection, you can upload any custom apps your organization has developed so that they'll become available for users to find and install when they browse apps under From Your Organization.
-
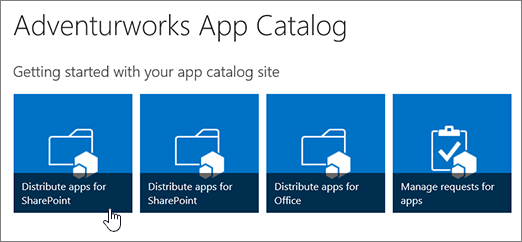
On the home page of the App Catalog site, select the tile labeled either Distribute apps for SharePoint or Distribute apps for Office, depending on which type of app you are uploading.
-
In the relevant apps library, select new app.

-
Browse to locate the folder that contains the app you want to upload, select the file, and then click Open.
-
In the Add a document dialog box, add any optional comments you'd like about this version of the app, and then click OK.
-
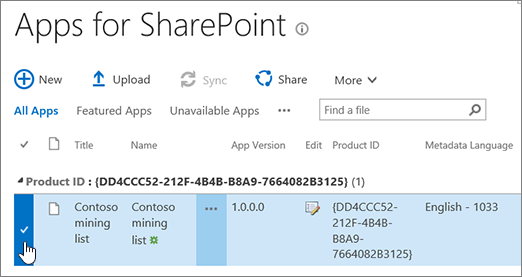
From the Apps for SharePoint dialog, click the ellipses (...) next the name column, click the next set of ellipses (...), and then click Properties.
-
In the properties dialog form, review or update the Name for the app. You can also specify things like a Short Description or a Description. Not all of the information listed in the properties dialog box is required to upload the app. Follow the instructions on the screen for things like image size.
-
If you have an icon you want to use for the app, you can provide a URL for that in the Icon URL field.
-
If you want to categorize the app so that it is appears under a specific category, select or specify a Category.
-
You can fill in the Publisher Name if you want.
-
If there is a site or location where app users are able to access Help for the app, you can provide a URL for that in the Support URL field.
-
In the next few fields you can add up to five still images or screenshots for the app, and a URL to a video. Images should be 512px by 384px. You can also add descriptions to each image or video.
-
Make sure the Enabled check box is selected so that users are able to add this app to sites.
-
If you want the app to be listed in the Noteworthy content view of the App Catalog, select the Featured check box.
-
If it appears, in the Hosting Licenses box, specify the number of licenses you think you will need.
-
Select Save.
Note: If you want to make third-party apps available for users to find and install, you simply need to buy a site license for them. When you buy a site license for a third-party app from the SharePoint store, the apps will automatically display under Apps You Can Add.
Step 3 (optional): Install an app for users
If there is an app you want all users to be using, you can deploy that app to specific site collections, managed paths, or site templates. Deploying an app essentially installs that app on a site for users so that is available for use. Deployed apps appear on the Site Contents page for a site.
You can deploy a third-party app, or you can deploy a custom app.
Deploy a third-party app
If you buy a site license for a third-party app, then that app is automatically available for users to install when they browse apps under Apps You Can Add.
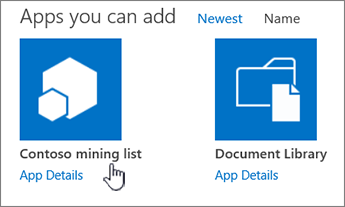
However, if you want to make the app available for use without requiring users to find and install it, you can deploy it.
-
If you have not already purchased the app, you must buy it first. For information about how to do this, see Buy an app from the SharePoint Store.
-
On the App Catalog site, Click Settings
 and then click Add an app.
 -
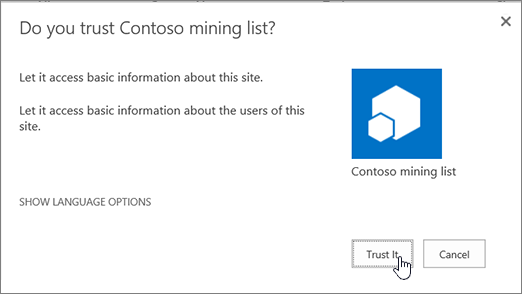
Select the app you want to add, and select Trust It when prompted.
-
On the Site Contents page, find the app you want to deploy.
-
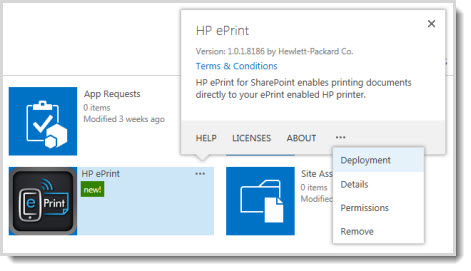
Select the ellipses (...) next to the app, select the ellipses (...) again in the callout to view the menu, and then select Deployment. (for some apps the Deployment command may appear on the first callout).
-
On the Manage App Deployments page, type the URL for each site collections to which you want to deploy the app, and then select Add to add it to the list.
-
In the Managed Paths section use the Add button to specify which managed paths should have this app available.
-
In the Site Templates section, use the Add button to specify which site templates should have this app available.
-
Select OK.
-
If you are prompted to Trust the app, select Trust It.
Deploy a custom app
If you upload a custom app to the App Catalog, it is automatically available for users to install when they browse apps under From Your Organization. If you want you want the app to be available for use without the need for site users to install it, you can deploy it.
-
Before you can deploy a custom app, you must first upload it to the App Catalog site. For step-by-step guidance about how to do this, see the section of this article Add custom apps to the App Catalog site.
-
After you have uploaded the app, you then must add it as an app to the App Catalog site so that it appears on the Site Contents page for the App Catalog itself. On the App Catalog site, go to Settings
 and then click Add an app.
 -
Select the app you want to add, and click Trust It when prompted.

-
On the Site Contents page, find the app you want to deploy.
-
Click the ellipses (...) next to the app, Click the ellipses (...) again in the callout to view the menu, and then click Deployment. (for some apps the Deployment command may appear on the first callout).

-
On the Manage App Deployments page, type the URL for each site collections to which you want to deploy the app, and then click Add to add it to the list.
-
In the Managed Paths section use the Add button to specify which managed paths should have this app available.
-
In the Site Templates section, use the Add button to specify which site templates should have this app available.
-
Click OK.
-
If you are prompted to Trust the app, click Trust It.
Notes:
-
It may take up to 30 minutes for an app to deploy.
-
If you deploy an app that adds commands to the item callout for document libraries or lists, then those commands are visible to users. However, if you deploy an app that features custom ribbon controls or an App Part, additional steps may be required to make the user interface commands for the app appear.
-
Remove an app from the App Catalog
If you no longer want a specific app to be available for users to install, you can remove it from the app catalog. Any instances of the app that have already been added to sites by users will remain, but the app will no longer be available for users to add to additional sites.
-
On the App Catalog site, select the Apps for SharePoint list.
-
Select the app that you want to remove.
-
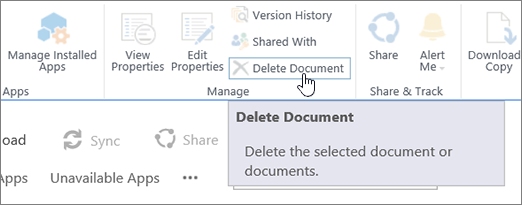
In the ribbon, on the Files tab, click Delete Document to remove the app.
-
In the dialog box, click OK to confirm that you want to send the item to the site Recycle Bin.


COMMENTS